How To Stretch an Original Art Canvas

“Destination Within” professionally stretched
It's exciting when you receive your original piece from Lïlï Dauphinee. As anxious as we know you will be to hang the painting, it must be stretched on a frame first. She ships her paintings rolled for ease of travel, lower shipping costs, and, most importantly, protection. A rolled painting is far less likely to sustain damage to its surface when compared to delivery when stretched or framed.
So, this article will explore how to stretch an original artwork, whether by our beloved Lïlï or another talented artist. We understand that not everyone has the desire or the skills to stretch a painting. But don't worry—towards the end of the article, we will touch on some third-party options, which will make you feel relieved and less anxious. However, perhaps it's best to understand why stretching a canvas is important before we get into the how.
Why is Canvas Stretching Important?
For practical reasons, canvas stretching is an important part of owning and displaying original art. Stretching your canvas contributes to the overall quality and longevity of the artwork. A well-stretched canvas offers durability and stability, preventing the painting from sagging, wrinkling, or creasing over time. A well-stretched canvas enhances the appearance of the artwork, giving it a polished and refined look elevating the space in which it is hung.
How to Stretch an Original Art Canvas from Scratch
If you plan to stretch the canvas yourself, there are some important things you’ll need to know.
What You’ll Need
Here is a list of tools and materials required for stretching a canvas.
Original art on canvas by Lili
Stretcher bars
Staple gun and staples
¾” lumber
1 ½” finishing nails or Brad nailer w/ 1 ½” Brad nails
Miter saw or hand saw with miter box
Hammer (optional)
Corner keys (optional)
Preparing the Stretcher Bars
When you receive your original artwork from Lili, it comes rolled in a tube for protection and safe travel. Unpackage the piece and lay it out on a large, flat surface. The edges of Lili’s paintings are always obvious, so with your tape measure, measure from corner to corner for both the width and height of the inside border of the painting. This is where the frame will start so that the sides of the piece will have a painted edge all around after stretching.
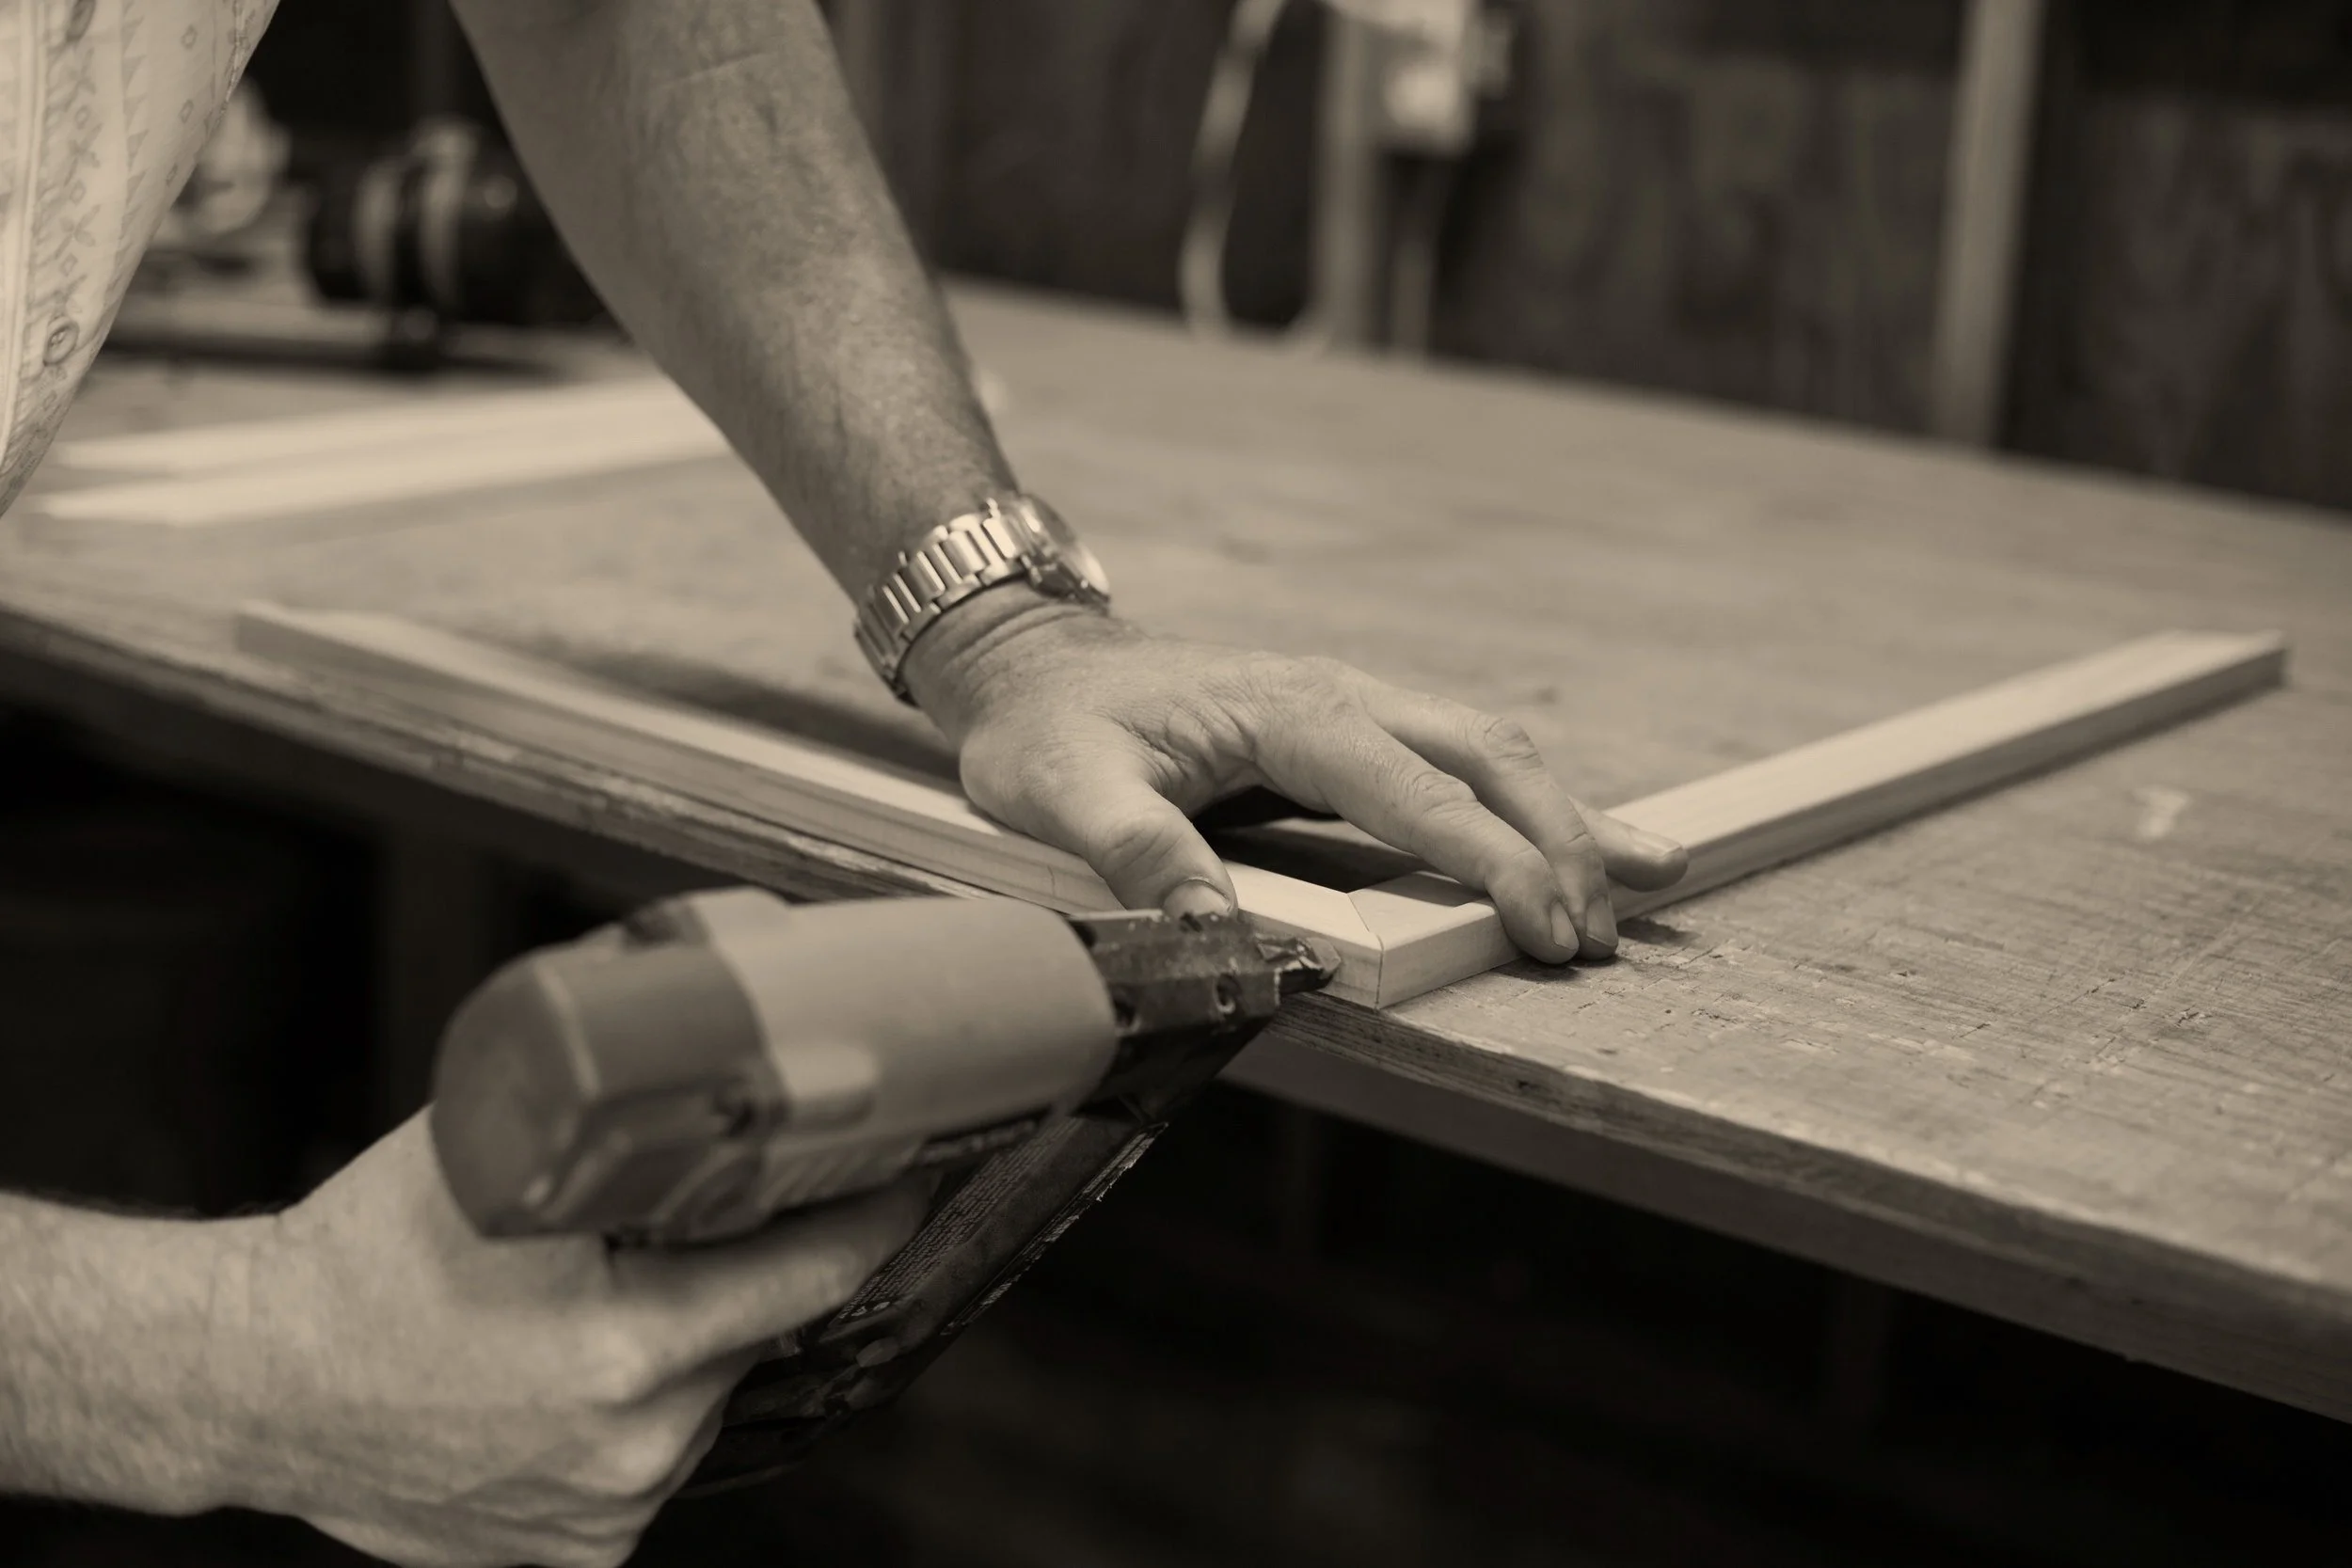
Assembling the stretcher bars with a brad-nail gun.
Then, cut your stretcher parts according to your measurements: two for height and two for width. I prefer to miter the ends of my stretcher parts. You’ll also cut a bracing bar, but not before your basic stretcher frame is assembled. Preassemble and dry-fit the stretcher on a flat, level surface, and use the brad nailer to secure the corners together. Once all four pieces are assembled, measure the bottom inside measurement along the longest edge of the stretcher. Cut a piece at that length and install it at the midpoint of the longest edge. This will help prevent the frame from warping. Before nailing this piece in place, check the square of the stretcher, ensuring each corner is true to ninety degrees. Clean up any glue drips with a wet rag
Stretching the Canvas
Line ‘er Up
Lay out the original art by Lili face down (so be sure the surface is clean and free from any objects) on a large, flat surface. Place the stretcher on top of the backside of the canvas, and line up a corner of the stretcher with the corresponding point at the painting’s corner. Square up the rest of the frame with the border of the painting. You can often see the painted surface through the canvas enough to do this. If not, measure from the edge of the canvas to where the painting starts and then transfer this measurement to the back side of your painting, creating two intersecting corner lines. Line the stretcher within these marks.
Staple Away!
While continually checking placement, start at the center point of one end (typically a short end first), fold the canvas over with the canvas plier, and staple the canvas to the stretcher. Repeat this step with the opposite edge of the canvas, making sure to pull the canvas taunt before placing the staple. Fold and staple the remaining two edges similarly, avoiding creasing or wrinkles.
Once the center points of all four edges are folded and secured with staples, work your way from the center point to each corner, pulling and folding with equal tension as you place each staple. Staples should be 2-3 inches apart. Stop your staples several inches from each corner to give yourself enough canvas to fold the corner over properly.
Folding Corners
This step is similar to folding the corners when wrapping a gift. Folding the corners of a canvas is a crucial step in achieving a professional and tidy finish, so I've provided a detailed description below.
How to Fold the Corners of a Canvas
Staple Up to the Corner: As just discussed, leave the last 2-3 inches near the corner unstapled.
Create the First Fold: Take the excess canvas at the corner and fold it inward toward the corner of the stretcher bar at a 45-degree angle. This will create a small triangular flap. Staple it in place.
Tuck and Fold: With one hand holding the triangular flap in place, use the other hand to pull the remaining loose canvas over the corner and down along the edge of the stretcher bar. Ensure the canvas is tight and smooth, without wrinkles.
Secure the Corner: Hold the folded corner firmly and staple it. You may need multiple staples to ensure the canvas is securely fastened and does not loosen over time.
Check and Adjust: Inspect the corner to ensure it is neat and tightly folded. Adjust the folds and add additional staples if necessary to achieve a clean and professional look.
Final Adjustments
If you decide to make your frame accommodate corner keys (also known as tightening keys), install them now. Corner keys are small wedges hammered into the inside corners of the frame to fine-tune squareness and canvas tension. You can also use corner braces. If you explore the other options below, your stretcher will most likely come with one of the above.
Other Options for Stretching a Canvas
Most of you probably think, “That's WAY too much work!” Luckily, other options are available for those less inclined to stretch a canvas.
Pre-Made Stretcher Kits
These are the best of both worlds: you do not have to measure and cut your stretcher parts, but you still get the satisfaction of stretching the canvas yourself. There are many products online for premade stretcher bar kits. These are precut, flat-packed stretchers of a specific size ready for assembly. Simply order one the same size as your original canvas painting, assemble it, and stretch it.
Hire a Professional
If you prefer to be completely hands-off, a simple Google search for “canvas stretching near me” will reveal the closest place to take your Lili Dauphinee original for stretching.
Elevate With a Frame
You can elevate your original artwork with a frame if you are so inclined. Framing a canvas painting has both aesthetic and practical appeal. A well-chosen frame enhances the artwork's visual appeal, complementing its colors, style, and subject matter while providing a polished look. Beyond aesthetics, framing protects the painting from environmental damage, such as dust, dirt, and physical impact, ensuring its longevity. It also provides structural support, keeping the canvas taut and preventing warping or sagging over time.
Stretched to Impress
Stretching your original canvas painting is essential to ensure it looks its best and stands the test of time. While it may seem daunting initially, following these detailed steps will help you achieve a professional finish, allowing you to fully appreciate and display your original artwork. It's important to remember that you don't have to do it yourself. Pre-made stretcher kits and professional stretching services are excellent alternatives for those who prefer a hands-off approach. Remember, your effort to stretch your canvas enhances its visual appeal and preserves its integrity for years. Whether you're a DIY enthusiast or prefer to leave it to the professionals, your Lili original deserves the best presentation possible.